

Steps
1(a) Download GIMP
If you do not have GIMP, please download it here: GIMP 2.10. If you are a Linux user, download GIMP from flathub.
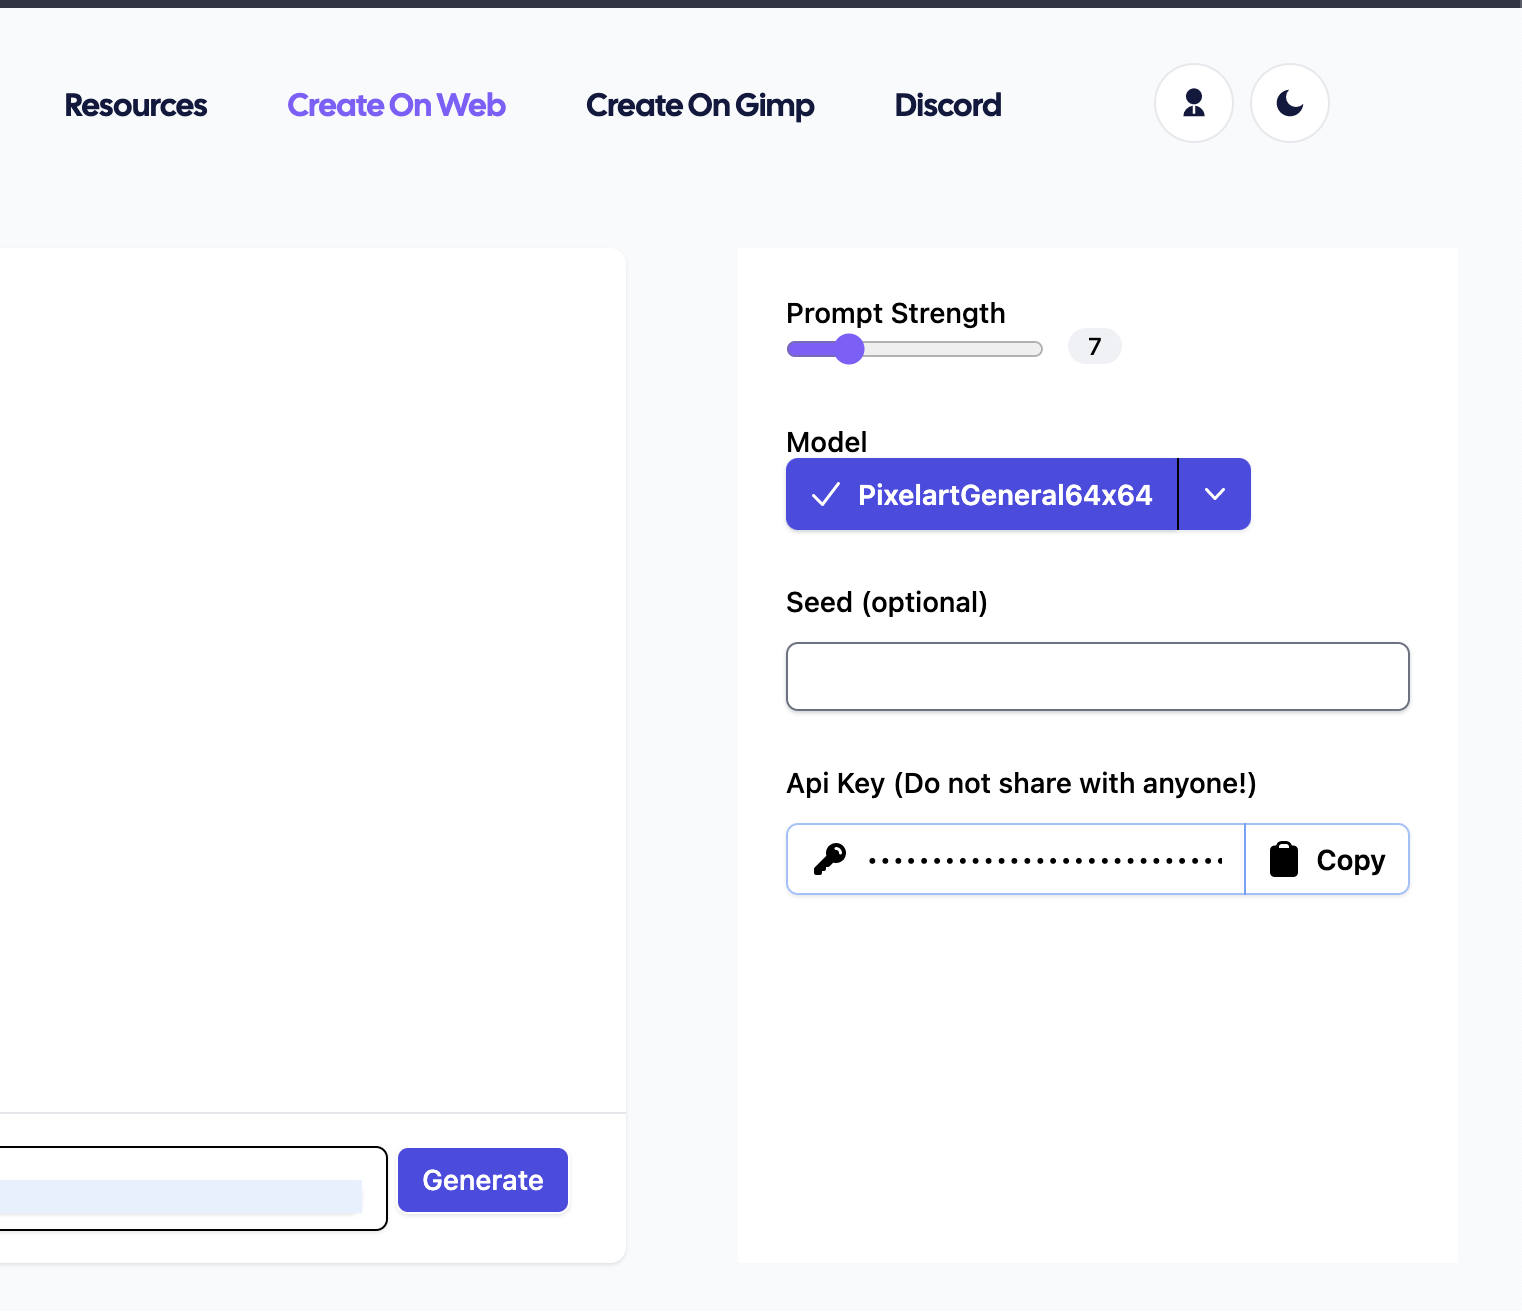
1(b) Get your API key
Your API key identifies you uniquely. To get it, click the "Create on Web" tab just above this tutorial. Login with your user account and then you should be able to see a button on your screen to copy your API key. Keep this safe for later.
1(c) Setting up Pelgine GIMP Plugin (Mac & Linux Only)
If you are on Mac or Linux, change the file permissions to 755 on the file you've downloaded from the previous step.
2. Load GIMP Pelgine Plugin File Into GIMP
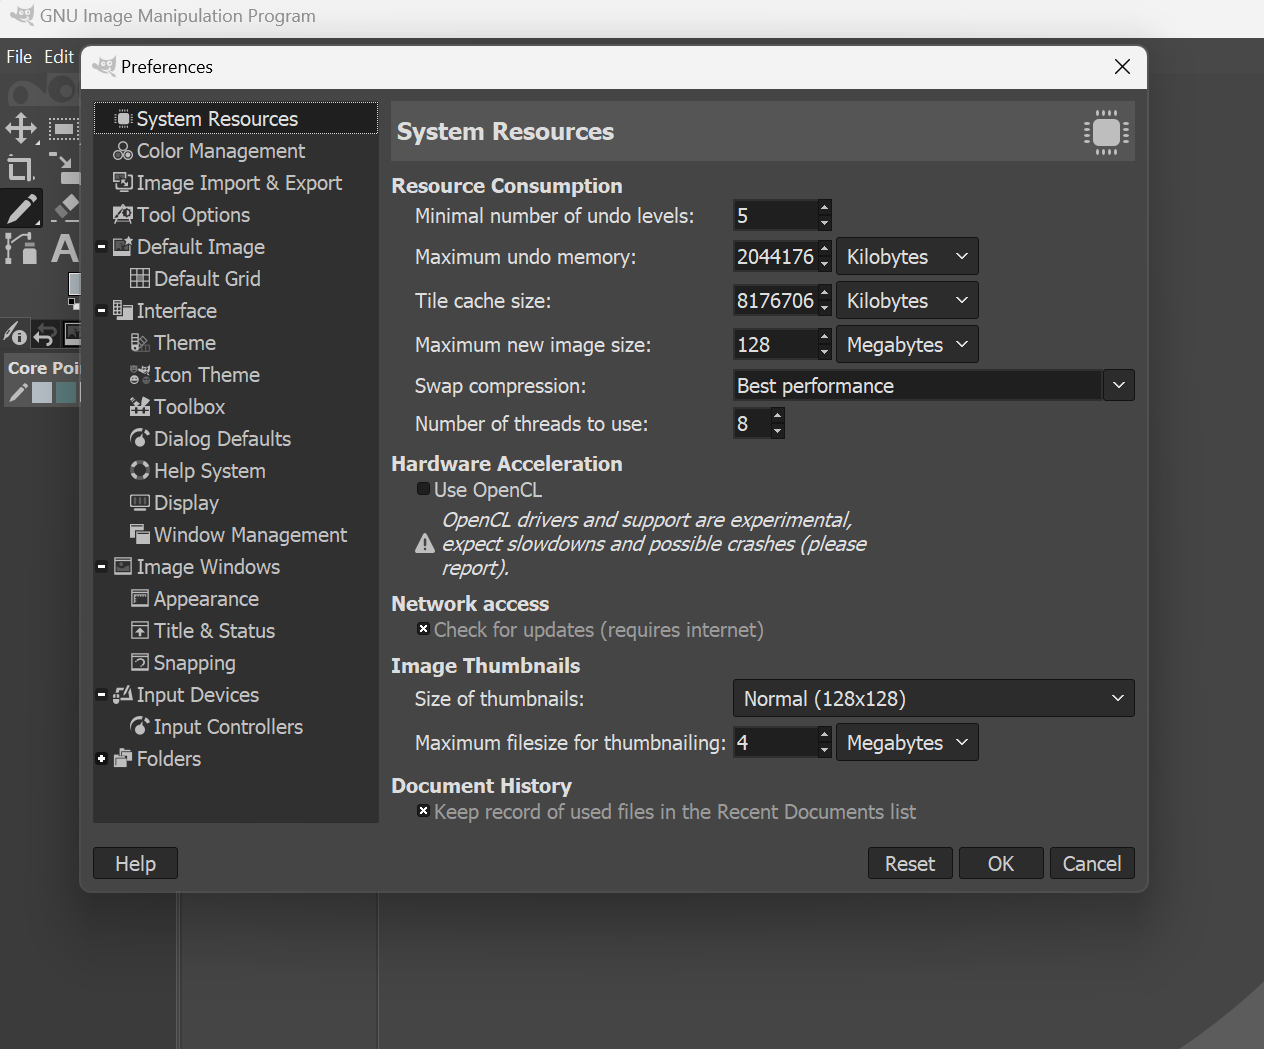
We will get the file from the step 1(c) loaded into Gimp. Open Gimp and click [Edit -> Preferences] like the image below:
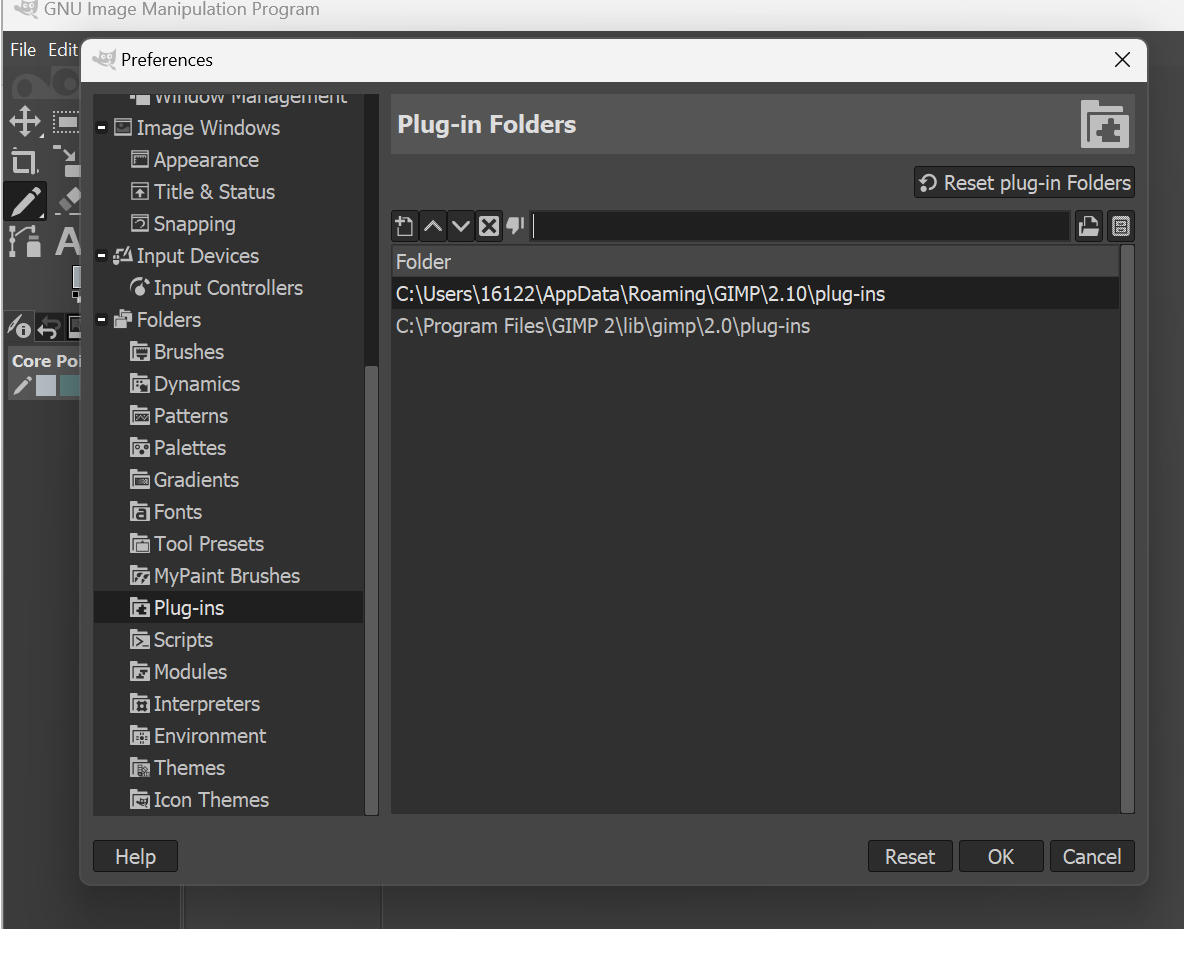
Next, scroll to he bottom of the list on the left side until you see "Folder", and expand that. You should see "Plug-ins" as a subdirectory. Open the Plugins directory:
On the right side, click on the folder that [contains your computer's username] on it. This will load the selected directory above. After clicking it, click the icon with the file cabinet. This will open the "plug-ins" directory. Once the "plug-ins" directory is open drop the Pelgine GIMP file from 1(c):
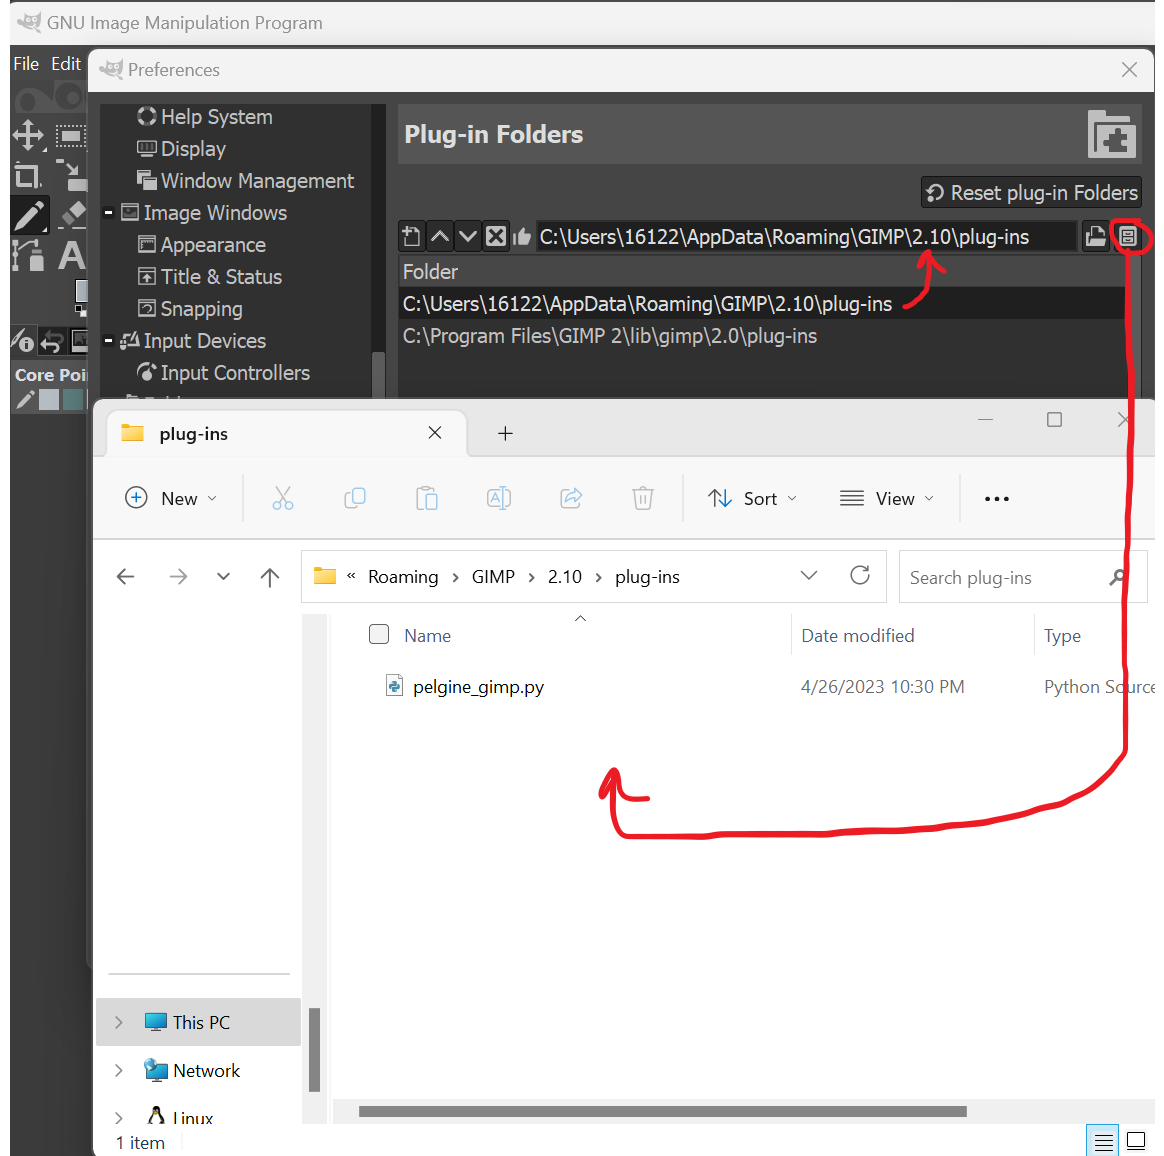
Restart GIMP, and you should be ready to go!
3. Using Pelgine in Gimp
After restarting GIMP, you should notice a new tab in the upper left titled "Pelgine". You can't click on it until you open a canvas of any size. With your canvas open, you can now use Pelgine. At this stage, you should have your API key from step 1(b), so enter it along with your prompt settings.